


The Perfect Pompom Project

Prym 2-in-1 Pompom Maker is an expertly designed tool for making perfect pompoms. The fixed disks on each handle are easy to wrap, helping you make a full dense pompom every time. What to do with your finished pompoms? Well the sky is the limit as far as that goes! Pompoms are clever for home decorating – they make great garlands and wreaths. You can wear them, too; dangle them from belts and bags to create one-of-a-kind boho looks.
To make a pompom, you will need the following supplies:
- Prym 2-in-1 Pompom Maker in desired size
- Yarn
- Scissors
- Crochet Hook

1. The Prym 2-in-1 Pompom Maker comes in 2 sets. Each set includes a handle and 2 sets of disks. Each set of disks makes a different size pompom. The small handle set comes with a set of tangerine disks for making 1.5” pompoms. The red disks are for 2” pompoms. The large handle set comes with pool blue disks for 3” pompoms. Use the apple green disks to make 3.5” pompoms.

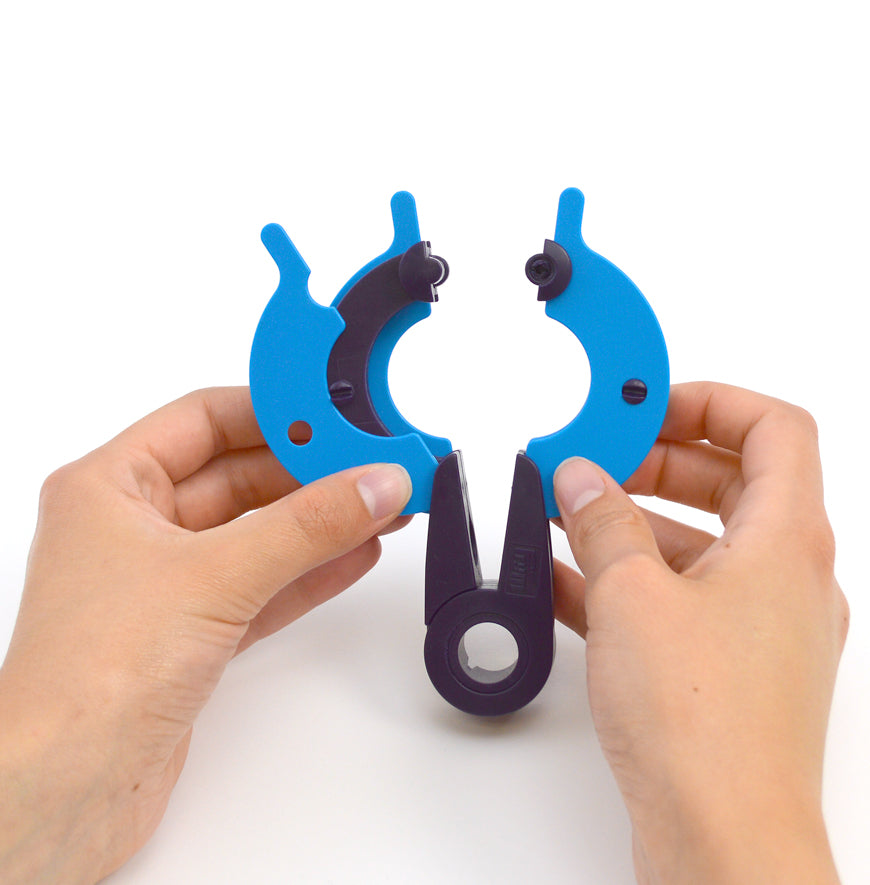
2. The disks are easily changed by popping the disk off the center peg and then pulling to remove. Insert the desired disk into the bottom corner of the handle and then rotate into position. Snap onto center peg to secure.
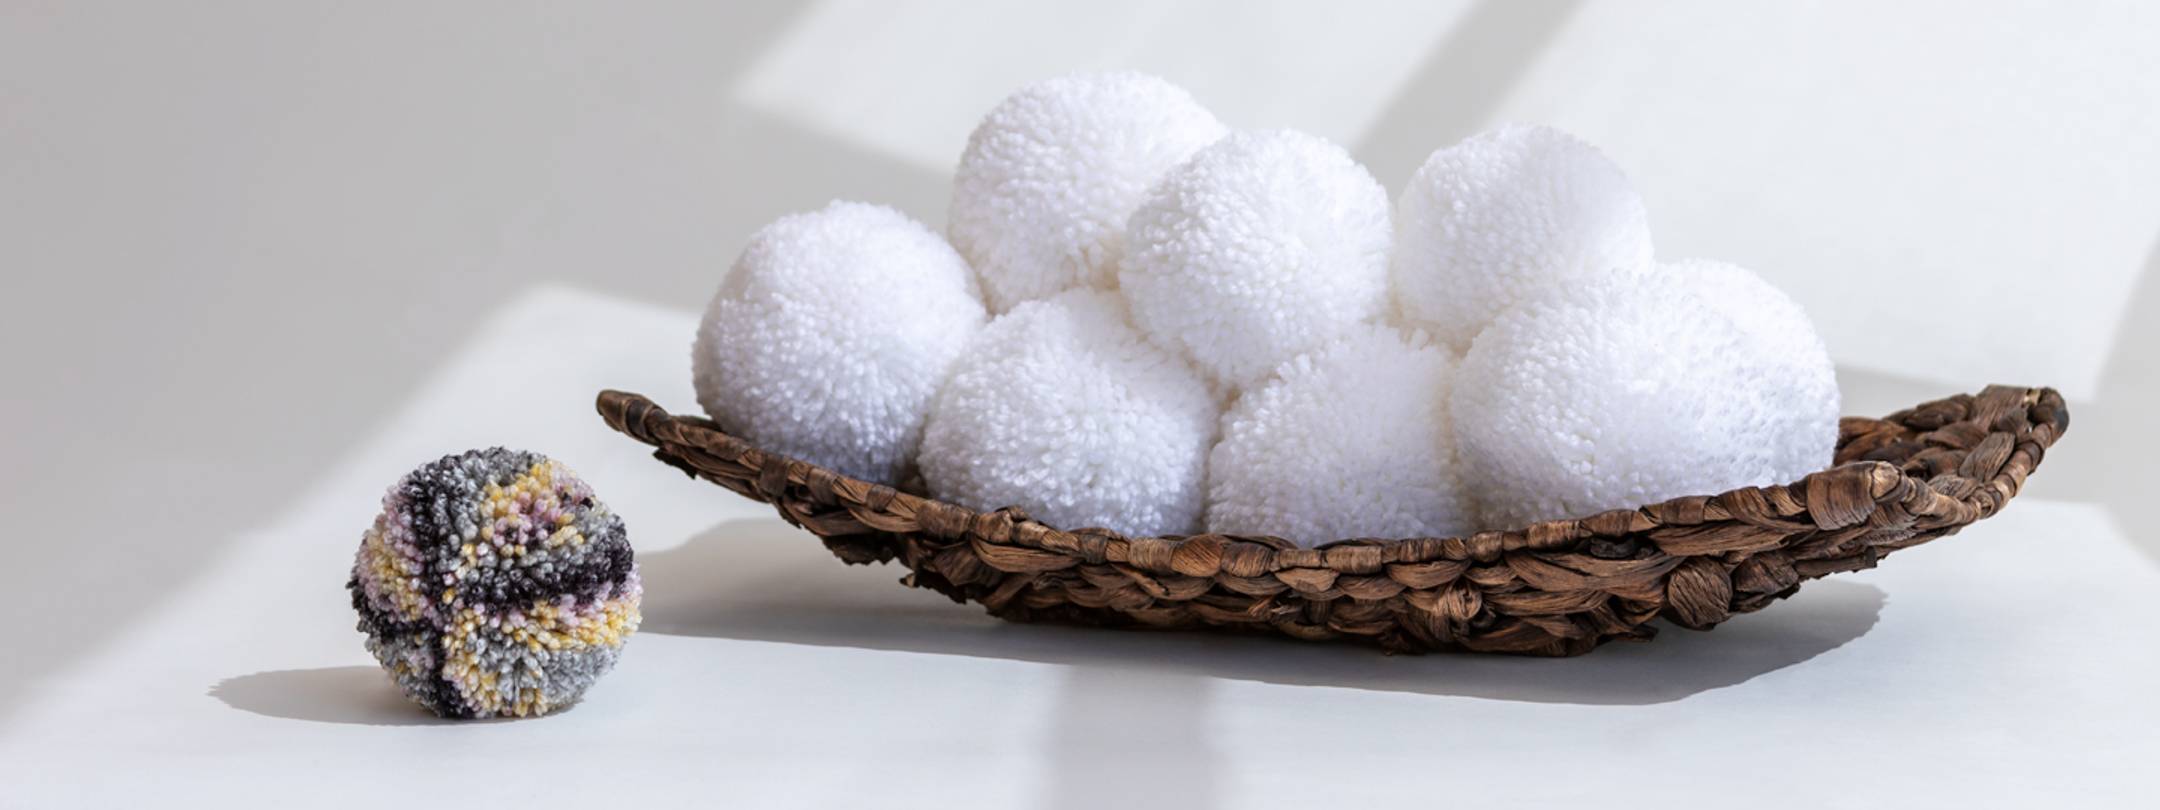
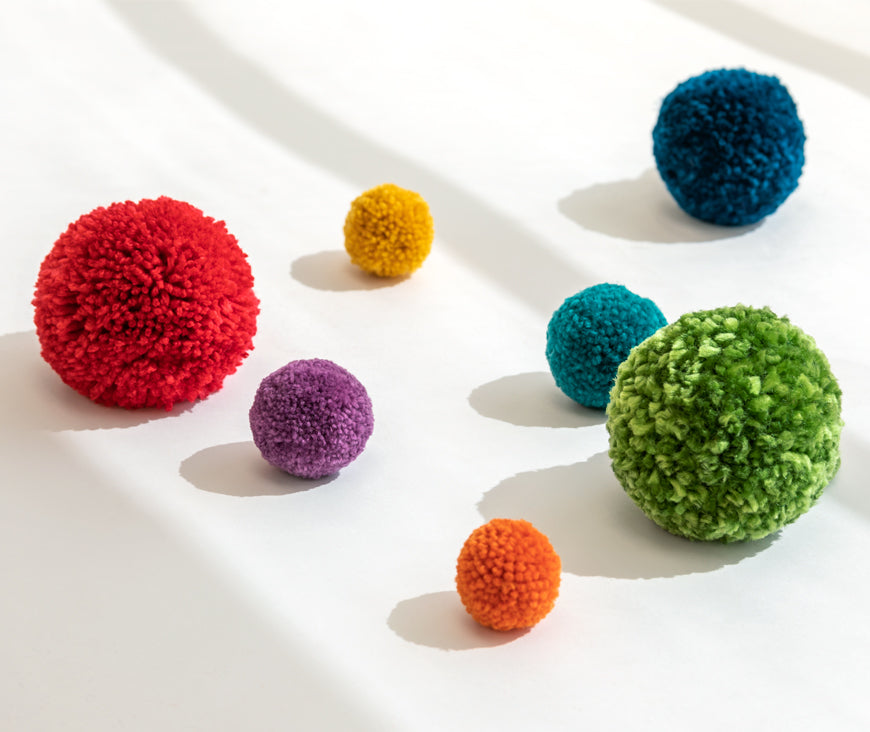
3. Pick your yarn. Fine to medium weight yarns will make nice dense pompoms. Save heavier yarns for larger pompoms. Acrylic and wool make nice full pompoms. But really, you can use any weight or fiber content that you would like. Just know that your yarn will dictate what your pompom will look like. Here are examples of different yarns and what the pompoms look like.
4. To open the 2-in-1 Pompom Maker, push the right arms away from you while holding left arms firmly. This will open the lock pegs and allow the arms to swing open. The arms on both sides of the handle are fixed and will not separate as you wrap the yarn around the disks.

5. Wrap the yarn evenly around one side of the pompom maker. Make sure the lock & handle of the pompom maker are not covered with yarn. Tip: Use 2 strands of yarn for faster wrapping.

Bonus Tip: Pulling the yarn tightly as you wrap it on the pompom maker will allow you to wrap more yarn around the disks and that will create a denser pompom. For a looser pompom do not wrap yarn tightly or fill the maker as full. You can make your pompom as full or loose as you desire.

6. Use a crochet hook to secure yarn end in wrapped yarn. Repeat wrapping yarn on other side of pompom maker. Be sure to fill each side of the pompom maker evenly. Close pompom maker. This may be a little challenging if you overfill the maker; but it must be locked close to finish making the pompom.

7. Cut the wrapped yarn between the disks but do not open the pompom maker. The yarn pieces will stay in place until they are tied together.

8. Cut a long piece of yarn (at least 24”) and double it. Thread the folded end of yarn through the hole in the handle and between the disks. Tie a double knot to secure yarn ends. For the first knot loop, wrap the yarn around loop twice and pull to tighten. This will help to hold the knot tight while you make a second single loop to secure the knot. Open pompom maker and remove the pompom.

9. Now it is time to trim the pompom! Make a rough cut around the middle of the pompom.

10. Next, trim all sides of the pompom evenly. Hold the pompom gently and shake frequently to release any yarn fibers that need to be trimmed. Continue to make small snips to remove any remaining unevenness on the pompom.

Finished! The perfect pompom.

Any yarn can be used to make a pompom. Fine to medium yarns in acrylic or wool will make the fullest pompoms. Different fibers and sizes of yarn will affect the final look of the pompom. Combine yarns for fun effects.


Now the fun part...put that pompom to use! They are a unique and colorful addition to all kinds of craft, home décor and wearable projects.