


Knit I-cord Coasters Project

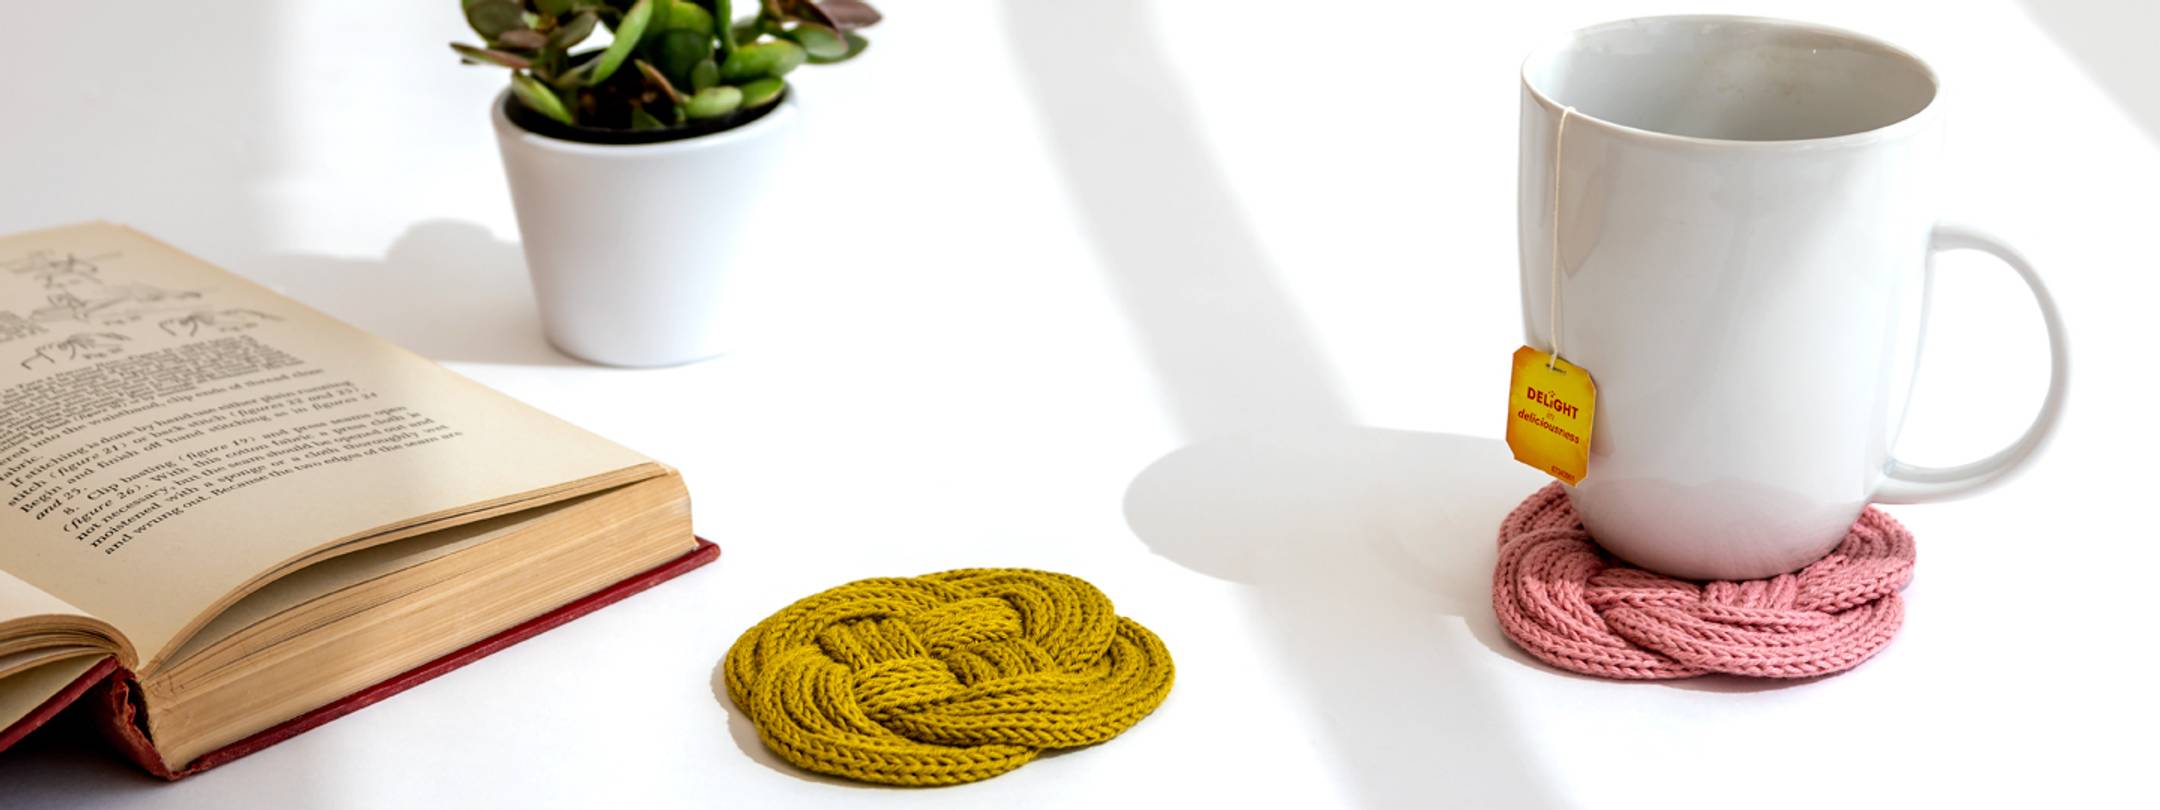
Colorful, textural and oh-so-relaxing to make – it’s a set of knit I-cord coasters created with the Prym Comfort Twist Knitting Mill. Our Knitting Mill has comfort in its DNA, so using it to make lengths of knit I-cord is guaranteed to be relaxing. Taking the knit I-cord and fashioning it into a set of coasters is an easy way to create a functional accessory from your DIY knit cord.
Supplies:
- Prym Comfort Twist Knitting Mill
- Fine yarn – 1 to 3 weight
- Dritz Tapestry Needle
- Omnigrid Scissors
- Masking Tape
- Tape Measure

1. For each coaster, knit a 2-yard length of I-cord with the Comfort Twist Knitting Mill. Be sure to measure without the weight stretching your I-cord. It is OK if your cord is a little longer, you can just unravel to correct length after weaving the coaster knot. (Measuring from the bottom of the mill will provide a little extra length for weaving.) Remove I-cord from mill and loosely tape end to keep it from unraveling.

2. About 8” from finished end, form a 2 ½” loop with the working end laying on top of the short end. Short end is on the left and long working end is on the right. (We used a 1” grid paper [attach pdf] to help show the approximate size of loop.)

3. Bring the working end over the center of the loop for form a “pretzel” shape.

4. Bring working end under short end to begin a 3rd loop.

5. Weave working end, over right side of 2nd loop, under right side of 1st loop, over left side of 2nd loop and under left side of 1st Pull through knot to form a 3rd loop. This will be the hardest weave to pull though. Take the time to reposition all the loops to the right shape and size before moving to the next step.

6. To create 4th loop, follow the same weaving path along inside (right edge) of beginning end. This will form the outside edges of the coaster.

7. Continue to weave following the same weaving path and filling in the knot. The working end of the I-cord should always fall to the inside of coaster cording. As you weave, the working end will begin to fill in the knot.
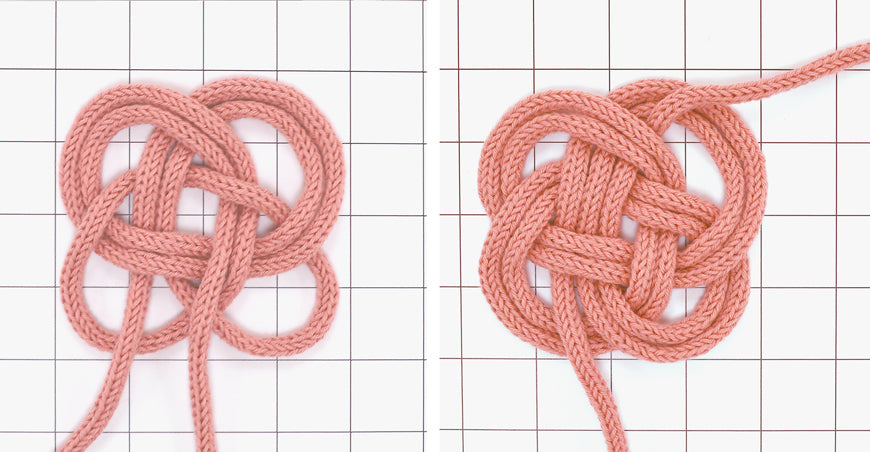
8. Continue weaving until you have completed 3 rounds. Tighten up any gaps that may remain.

9. On underside of coaster, remove tape from working end and unravel knitting until working end is at the same position as beginning end. Thread needle with unraveled yarn and weave through the last 4 stitches of the I-cord to finish end. Secure to coaster with a whip stitch.

10. Tuck beginning end into place on the coaster knot and secure to coaster with thread end. On underside of coaster, whip stitch I-cord edges together as desired. Stitching the outside loops together should be enough to keep everything in place.


Now wasn’t that fun? Coasters are handy to have around and always match perfectly when they’re custom made.