


- Home Decor
- Intermediate
Floor Cushion Project

Floor cushions are another easy way to add punch and personality to your space. In addition to looking good, they usually come in handy for lounging, too! When we set out to make a few of our own we already had a favorite in mind, so check it out: it’s this French Mattress-Edge Cushions sewing tutorial from Sew4Home™. Their instructions were our jumping off point, although with two major differences – we changed the shape and added handles.
Check out their tutorial as well as our supply list and amendments below for making the round floor cushions with handles – then formulate your plan. The bottom line: you’ve got options when it comes to making one-of-a-kind floor cushions that perfectly suit your décor.

Supply List
- Fabric – home décor weight; amount needed is based on your insert/cushion size and will be determined in step 2
- Foam Insert – 5” project foam from Fairfield is a good choice; if insert is not to desired size or shape, a tool to cut it will also be needed (such as an electric knife)
- High-loft Batting – at least ½” thick; enough to wrap insert
- All-purpose and Heavy-weight thread to coordinate with fabric
- Dritz Home Faux Leather Handle Set
- Interfacing foam – small pieces to reinforce Chicago screws that attach leather handle
- Dritz Home Awl
- Dritz Fray Check® Liquid Seam Sealant
- Omnigrid 6” x 24” Ruler
- Dritz 120” Tape Measure
- Dritz Dual Purpose Marking Pen
- Dritz Sewing Gauge
- Dritz Seam Ripper
- Omnigrid 8-1/2” Scissors or 45mm Rotary Cutter
- Omnigrid 18” x 24” or larger mat
- Dritz Flat Flower Head Pins
- Dritz Home Decorator’s Needles
- Dritz Sharps Hand Needles
- Sewing Machine – with basic sewing supplies
- Wooden Table Topper – optional, if making stand to set cushions on
- Dritz Home Curved Country Bun Feet – optional, if making the stand to set cushions on
Step 1: Cut a piece of 5” project foam into a circle. You can use any depth of foam that you desire. We created a circle template and traced it onto the foam, then cut the foam with an electric knife to create the circle cushions. Following the Sew4Home tutorial, cover the foam with 2 layers of high-loft batting.

Step 2: Cut fabric pieces 2″ wider than the foam for the top and bottom. Cut side panel 2″ taller than the foam cushion. The length of the side panel matches the stitching line of cut top and bottom circles. Before constructing the cushion, mark the placement for the handle (as shown by the blue dots).

Step 3: To provide the extra thickness needed for the Chicago screws, pin small pieces of 1/4″ interfacing foam over each mark.

Step 4: Make the holes with an awl, and snip to make the holes large enough for the Chicago screws.

Step 5: Apply Fray Check liquid seam sealant to the holes to keep them from raveling.

Step 6: Insert the Chicago screw through the handle and then the hole in the fabric.

Step 7: Add the washer to the back of the screw and then finish with the screw back. Remove pins.

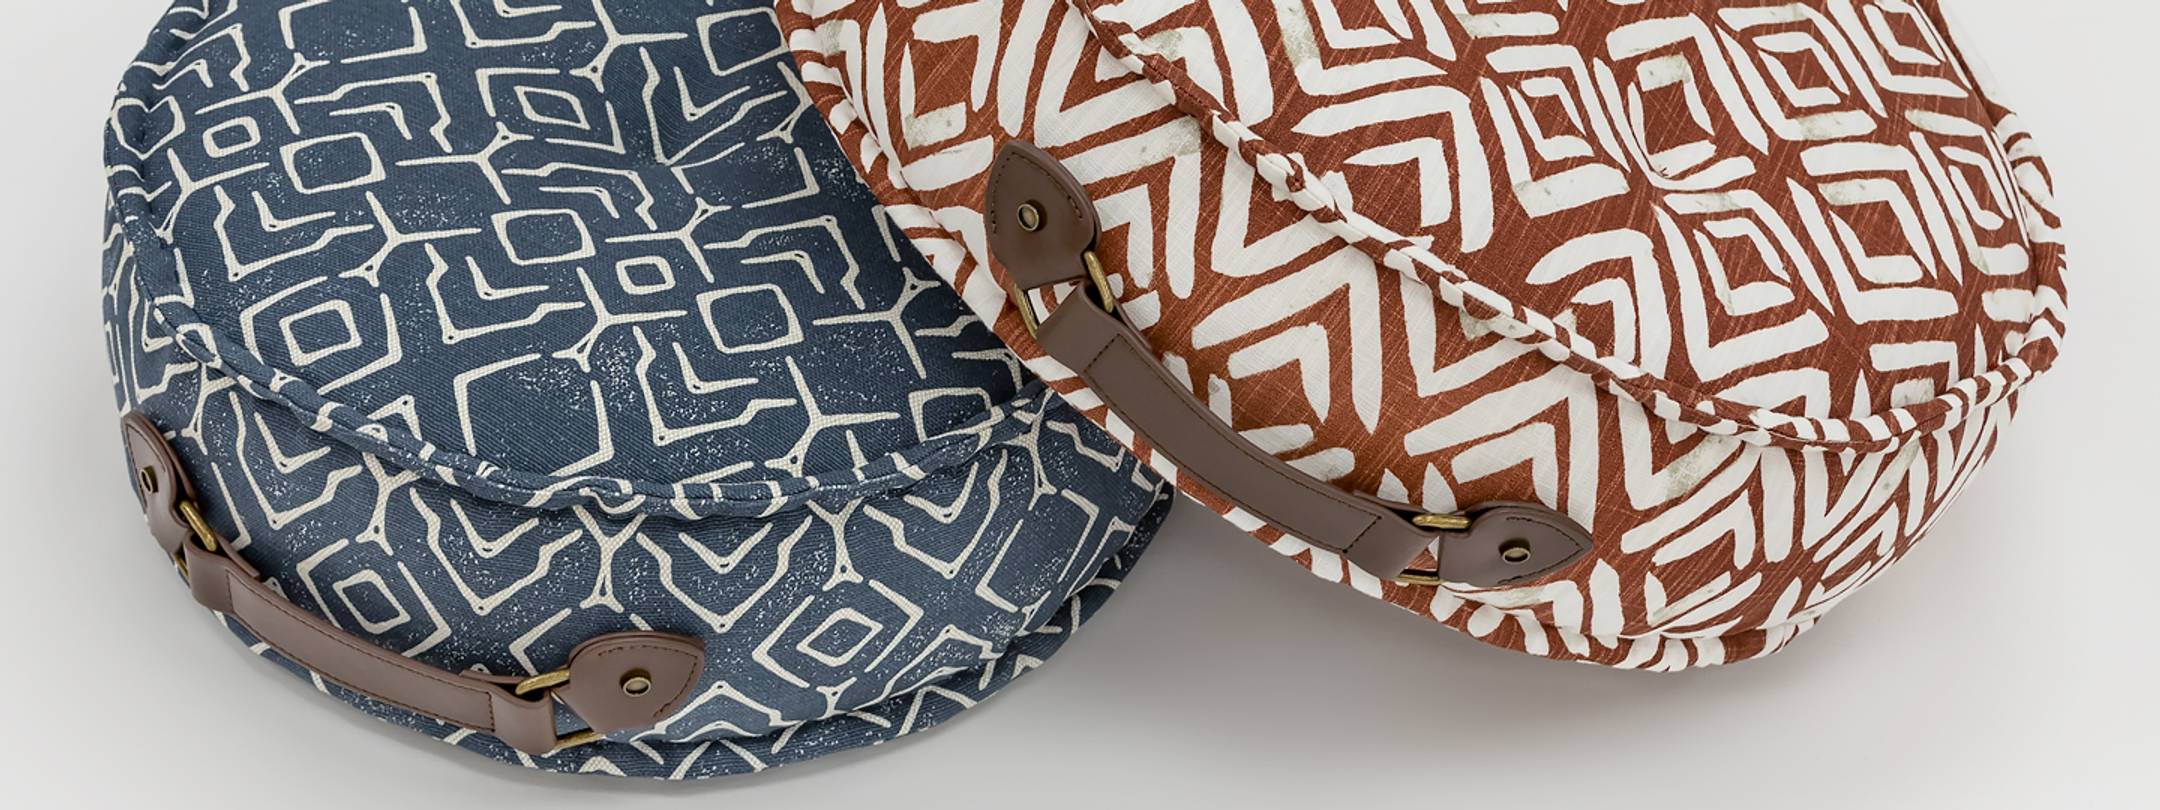
Step 8: This is what the handle will look like. (Note: we applied the handle before constructing the cushion, but it could be done after stitching and before inserting the batting-wrapped foam in the cushion.) For the rest of the project, finish stitching the cushion as described in the Sew4Home™ tutorial.

The addition of a faux leather handle really gives each floor cushion a professional, finished look. They also add function because you can use them to carry the pillows!

This pillow stand is also a quick little DIY project that you can do using a wooden table topper and wooden furniture feet. Simply install the bun feet and then paint or stain the pillow table as you like. The pillow table gives those pillows a home when not in use – they also just happen to look great stacked up!